identityProviders array:
clientId and clientSecret) can be provided as environment variables or Google Cloud secrets via tokens.
To configure multiple providers of the same type, see Configuring multiple providers of the same type.
Supported External Identity Providers
Sourcebot uses Auth.js to connect to external identity providers. If there’s a provider supported by Auth.js that you don’t see below, please submit a feature request to have it added.GitHub
Auth.js GitHub Provider Docs A GitHub connection can be used for authentication and/or permission syncing. This is controlled using thepurpose field
in the GitHub identity provider config.
instructions
instructions
Register an Oauth Client
CLIENT_ID and CLIENT_SECRET which you’ll provide to Sourcebot.- GitHub App
- GitHub OAuth App
<sourcebot_url>/api/auth/callback/github (ex. https://sourcebot.coolcorp.com/api/auth/callback/github)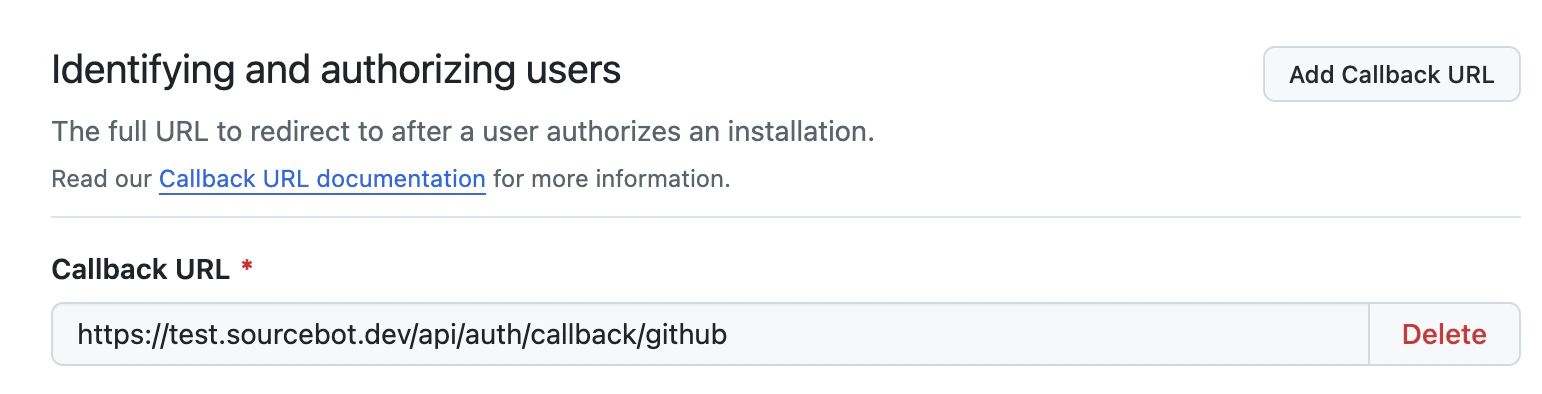

-
“Email addresses” account permissions (read)
-
"Metadata" repository permissions (read)(only needed if using permission syncing)
-
"Contents" repository permissions (read)(only needed if using the app to authenticate a connection)
Define environment variables
GITHUB_IDENTITY_PROVIDER_CLIENT_ID and GITHUB_IDENTITY_PROVIDER_CLIENT_SECRET)Define the identity provider config
identityProvider object in the config file:GitLab
Auth.js GitLab Provider Docs A GitLab connection can be used for authentication and/or permission syncing. This is controlled using thepurpose field
in the GitLab identity provider config.
instructions
instructions
Register an OAuth Application
- Set the callback URL to
<sourcebot_url>/api/auth/callback/gitlab(ex. https://sourcebot.coolcorp.com/api/auth/callback/gitlab) - Enable the
read_userscope - If permission syncing is enabled, also enable the
read_apiscope
APPLICATION_ID (CLIENT_ID) and SECRET (CLIENT_SECRET) which you’ll provide to Sourcebot.Define environment variables
GITLAB_IDENTITY_PROVIDER_CLIENT_ID and GITLAB_IDENTITY_PROVIDER_CLIENT_SECRET)Define the identity provider config
identityProvider object in the config file:Bitbucket Cloud
Auth.js Bitbucket Provider Docs A Bitbucket Cloud connection can be used for authentication and/or permission syncing. This is controlled using thepurpose field
in the Bitbucket Cloud identity provider config.
instructions
instructions
Register an OAuth Consumer
https://bitbucket.org/<your-workspace>/workspace/settings/api and create a new OAuth consumer under the OAuth consumers section.When configuring your consumer:- Set the callback URL to
<sourcebot_url>/api/auth/callback/bitbucket-cloud(ex. https://sourcebot.coolcorp.com/api/auth/callback/bitbucket-cloud) - Enable Account: Read
- If permission syncing is enabled, also enable Repositories: Read
Key (CLIENT_ID) and Secret (CLIENT_SECRET) which you’ll provide to Sourcebot.Define environment variables
BITBUCKET_CLOUD_IDENTITY_PROVIDER_CLIENT_ID and BITBUCKET_CLOUD_IDENTITY_PROVIDER_CLIENT_SECRET)Define the identity provider config
identityProvider object in the config file:Bitbucket Server
A Bitbucket Server (Data Center) connection can be used for authentication and/or permission syncing. This is controlled using thepurpose field
in the Bitbucket Server identity provider config.
instructions
instructions
Register an OAuth 2.0 Application
- Set the redirect URL to
<sourcebot_url>/api/auth/callback/bitbucket-server(ex. https://sourcebot.coolcorp.com/api/auth/callback/bitbucket-server) - If permission syncing is enabled, also enable the
REPO_READscope
CLIENT_ID and CLIENT_SECRET which you’ll provide to Sourcebot.Define environment variables
BITBUCKET_SERVER_IDENTITY_PROVIDER_CLIENT_ID and BITBUCKET_SERVER_IDENTITY_PROVIDER_CLIENT_SECRET)Define the identity provider config
identityProvider object in the config file:instructions
instructions
Register an OAuth Client
- Set the application type to “Web application”
- Add
<sourcebot_url>/api/auth/callback/googleto the authorized redirect URIs (ex. https://sourcebot.coolcorp.com/api/auth/callback/google)
CLIENT_ID and CLIENT_SECRET which you’ll provide to Sourcebot.Define environment variables
GOOGLE_IDENTITY_PROVIDER_CLIENT_ID and GOOGLE_IDENTITY_PROVIDER_CLIENT_SECRET)Define the identity provider config
identityProvider object in the config file:Okta
Auth.js Okta Provider Docs An Okta connection can be used for authentication.instructions
instructions
Register an OAuth Application
- Set the application type to “Web Application”
- Add
<sourcebot_url>/api/auth/callback/oktato the sign-in redirect URIs (ex. https://sourcebot.coolcorp.com/api/auth/callback/okta)
CLIENT_ID, CLIENT_SECRET, and ISSUER URL which you’ll provide to Sourcebot.Define environment variables
OKTA_IDENTITY_PROVIDER_CLIENT_ID, OKTA_IDENTITY_PROVIDER_CLIENT_SECRET, and OKTA_IDENTITY_PROVIDER_ISSUER)Define the identity provider config
identityProvider object in the config file:Keycloak
Auth.js Keycloak Provider Docs A Keycloak connection can be used for authentication.instructions
instructions
Register an OAuth Client
- Set the client protocol to “openid-connect”
- Set the access type to “confidential”
- Add
<sourcebot_url>/api/auth/callback/keycloakto the valid redirect URIs (ex. https://sourcebot.coolcorp.com/api/auth/callback/keycloak)
CLIENT_ID, CLIENT_SECRET, and an ISSUER URL (typically in the format https://<keycloak-domain>/realms/<realm-name>) which you’ll provide to Sourcebot.Define environment variables
KEYCLOAK_IDENTITY_PROVIDER_CLIENT_ID, KEYCLOAK_IDENTITY_PROVIDER_CLIENT_SECRET, and KEYCLOAK_IDENTITY_PROVIDER_ISSUER)Define the identity provider config
identityProvider object in the config file:Microsoft Entra ID (Azure AD)
Auth.js Microsoft Entra ID Provider Docs A Microsoft Entra ID connection can be used for authentication.instructions
instructions
Register an OAuth Application
- Under “Authentication”, add a platform and select “Web”
- Set the redirect URI to
<sourcebot_url>/api/auth/callback/microsoft-entra-id(ex. https://sourcebot.coolcorp.com/api/auth/callback/microsoft-entra-id) - Under “Certificates & secrets”, create a new client secret
CLIENT_ID (Application ID), CLIENT_SECRET, and TENANT_ID which you’ll use to construct the issuer URL.Define environment variables
MICROSOFT_ENTRA_ID_IDENTITY_PROVIDER_CLIENT_ID, MICROSOFT_ENTRA_ID_IDENTITY_PROVIDER_CLIENT_SECRET, and MICROSOFT_ENTRA_ID_IDENTITY_PROVIDER_ISSUER)The issuer URL should be in the format: https://login.microsoftonline.com/<TENANT_ID>/v2.0Define the identity provider config
identityProvider object in the config file:Authentik
Auth.js Authentik Provider Docs An Authentik connection can be used for authentication.instructions
instructions
Create a OAuth2/OpenID Connect application
- Set the provider type to “OAuth2/OpenID Connect”
- Set the client type to “Confidential”
- Add
<sourcebot_url>/api/auth/callback/authentikto the redirect URIs (ex. https://sourcebot.coolcorp.com/api/auth/callback/authentik)
https://<authentik-domain>/application/o/<provider-slug>/).Define environment variables
AUTHENTIK_IDENTITY_PROVIDER_CLIENT_ID, AUTHENTIK_IDENTITY_PROVIDER_CLIENT_SECRET, and AUTHENTIK_IDENTITY_PROVIDER_ISSUER)Define the identity provider config
identityProvider object in the config file with the following fields:JumpCloud
A JumpCloud connection can be used for authentication. JumpCloud supports OIDC (OpenID Connect), which Sourcebot uses to authenticate users.instructions
instructions
Create an SSO Application in JumpCloud
- Set the SSO type to “OIDC”
- Set the Token Endpoint Authentication Method to
client_secret_basic. JumpCloud defaults toclient_secret_post, but Sourcebot requiresclient_secret_basic. - Add
<sourcebot_url>/api/auth/callback/jumpcloudto the redirect URIs (ex. https://sourcebot.coolcorp.com/api/auth/callback/jumpcloud) - Set the login URL to
<sourcebot_url>/login
CLIENT_ID and CLIENT_SECRET. The issuer URL is typically https://oauth.id.jumpcloud.com.Define environment variables
JUMPCLOUD_IDENTITY_PROVIDER_CLIENT_ID, JUMPCLOUD_IDENTITY_PROVIDER_CLIENT_SECRET, and JUMPCLOUD_IDENTITY_PROVIDER_ISSUER)You must also set the AUTH_SECRET environment variable. Generate one with openssl rand -base64 33 and pass it to your Sourcebot deployment. While AUTH_SECRET is auto-generated if not provided, it must be explicitly set for SSO to work reliably across restarts.Define the identity provider config
identityProvider object in the config file with the following fields:Google Cloud IAP
Google Cloud IAP Documentation Google Cloud Identity-Aware Proxy (IAP) can be used for authentication. IAP provides a layer of security for applications deployed on Google Cloud, allowing you to control access based on user identity and context.instructions
instructions
Enable IAP for your application
/projects/<project-number>/global/backendServices/<service-id> or /projects/<project-number>/apps/<project-id>.Define environment variables
GCP_IAP_AUDIENCE).Define the identity provider config
identityProvider object in the config file with the following fields:Configuring multiple providers of the same type
By default, each provider in theidentityProviders array is identified by an id equal to its provider value. This id determines the provider’s OAuth callback URL (sometimes called the redirect URL):
<sourcebot_url>/api/auth/callback/github. The array form supports only one instance per provider type.
To configure multiple instances of the same provider type (for example, gitlab.com alongside a self-hosted GitLab instance), switch identityProviders to its object form, where you assign each provider a unique id:
identityProvidersis an object keyed by id instead of an array.- The id you choose (
gitlab-cloud,gitlab-selfhosted) sets the callback URL, so you register<sourcebot_url>/api/auth/callback/gitlab-cloudand<sourcebot_url>/api/auth/callback/gitlab-selfhostedwith their respective OAuth clients. - Set an optional
displayNameon each provider to give it a distinct label on the login screen. Without it, both instances fall back to the same provider-type name (for example, “GitLab”), making them hard to tell apart.
clientId and clientSecret) registered with the matching callback URL.